Note: This article only applies to users who conduct their own model builds. Please contact your support rep if you need assistance.
Adding to or removing the current attributes in the model
- Create a data template that matches the current model.
- To add additional site attributes, insert additional attribute columns to the right of the last attribute column in the data sheet.
- To remove a current attribute, delete the corresponding column from the data sheet.
- Format the data to be uploaded.
- Import the data as a new project.
Updating the current revenue data in the model
- Create a data template that matches the current model.
- To add more revenue subcategories, insert additional revenue columns to the right of the last revenue column in the data sheet.
- To update the current revenues, change them in the data sheet and rename the column headers to reflect the new data.
- Format the data to be uploaded.
- Import the data as a new project.
Caution: Be sure to only import the data sheet after making all of your desired changes to the site attributes and revenues.
Adding or removing layers from your model after upload
After importing your model, you can delete layers from your previous project or add new ones.
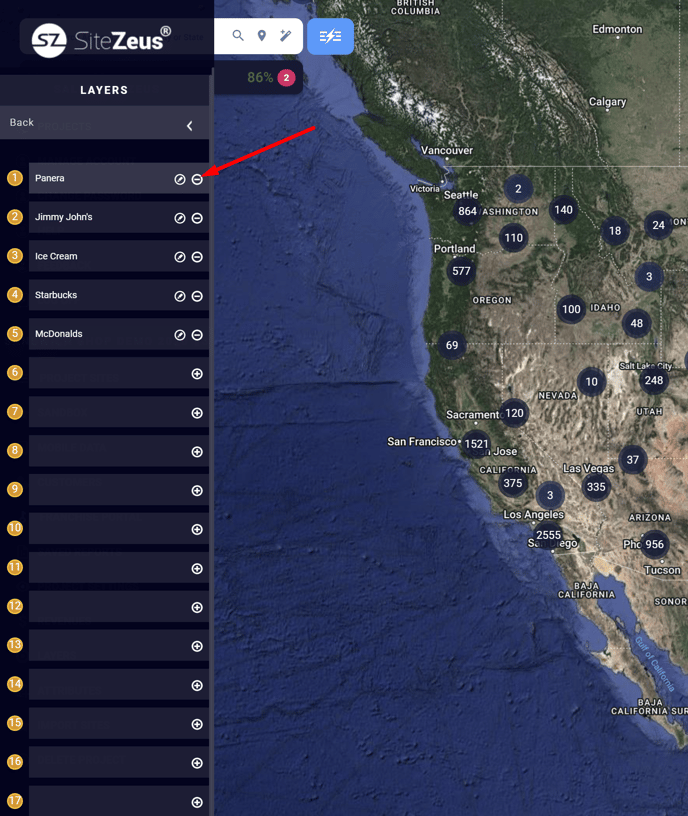
Removing layers
- Go to the Main Menu and select Layers.

- Select the minus icon to the right of the layer name(s) you wish to delete.
- After selecting the layers you'd like to delete, click the minus icon next to one of the selected layers again.
- Click "Yes" to confirm you'd like to delete the layer(s), then wait for the model to be rebuilt.
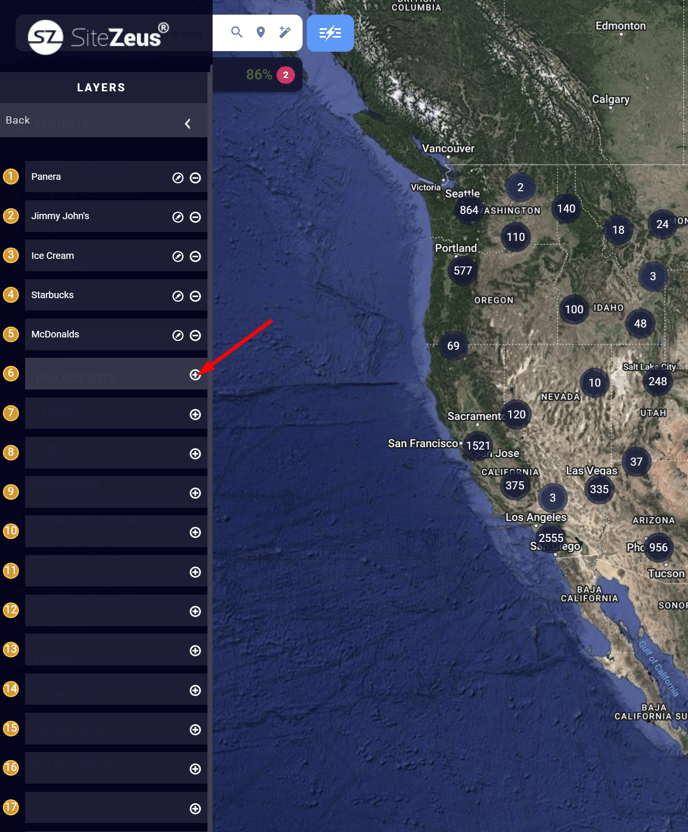
Adding layers
- Go to the Main Menu and select Layers.
- Select the plus icon next to one of the empty layer spots.
- Name the new layer.
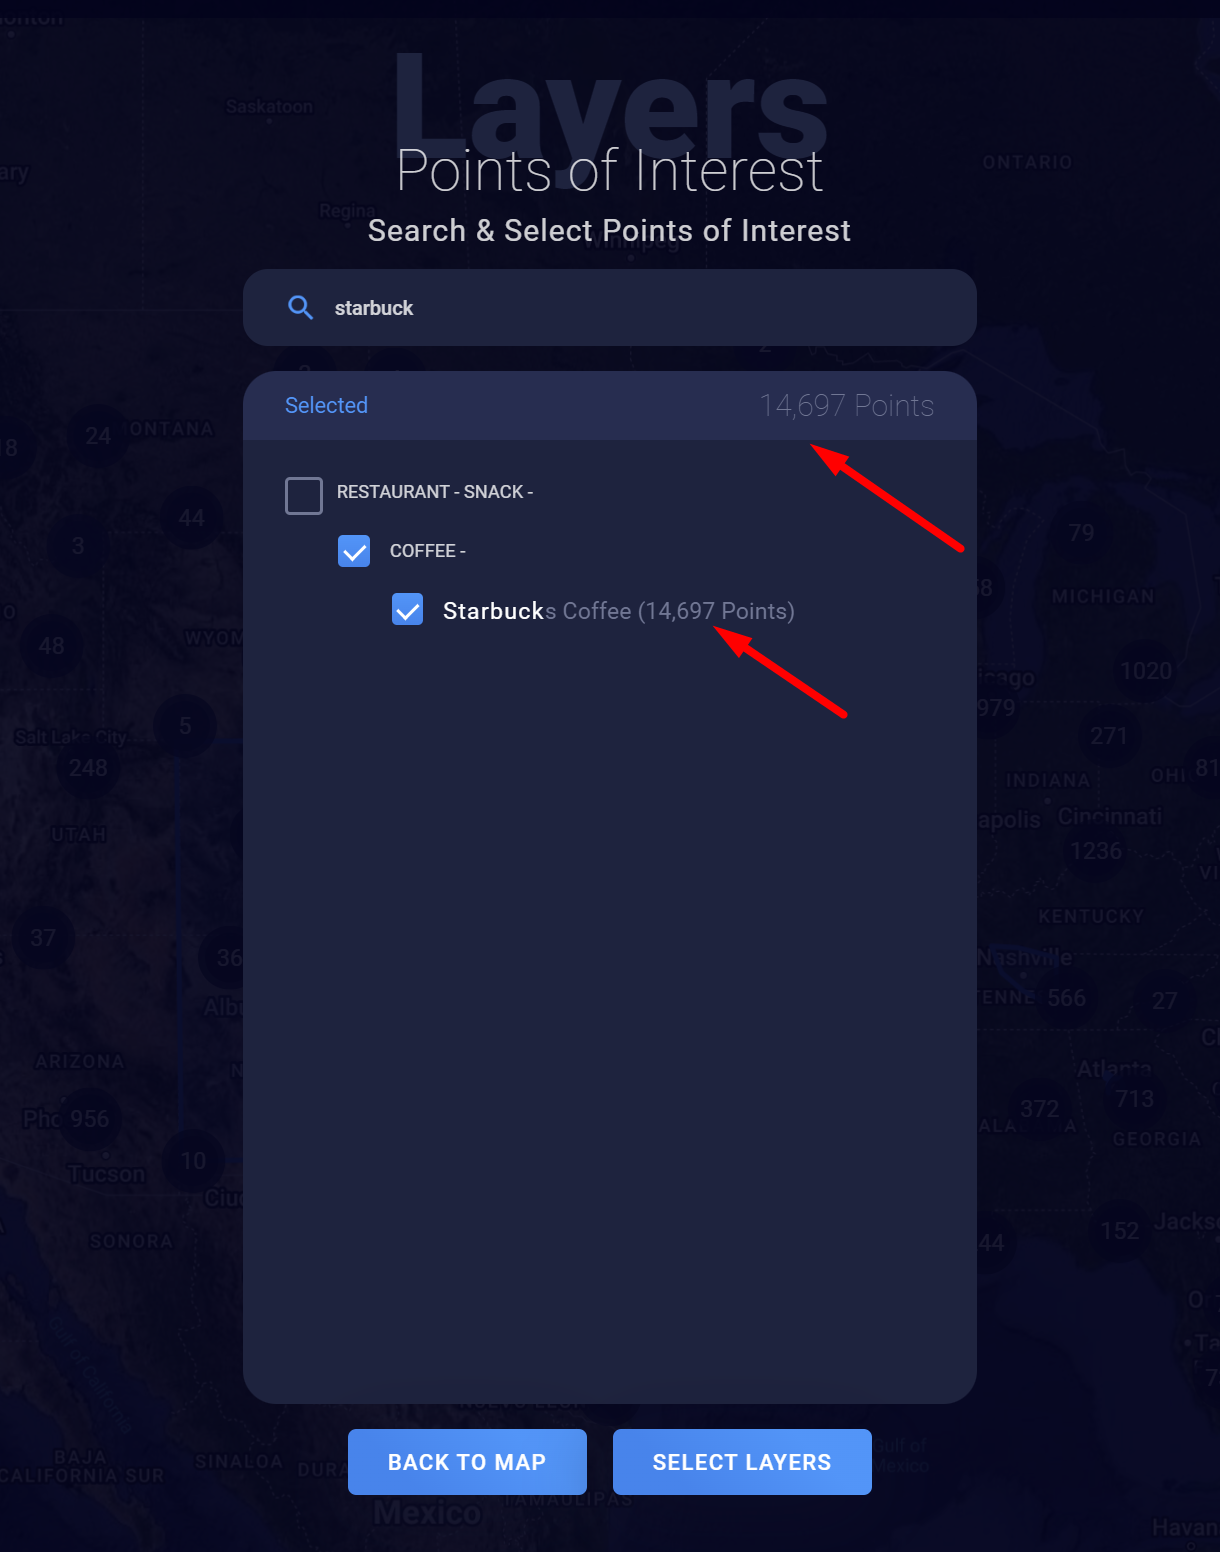
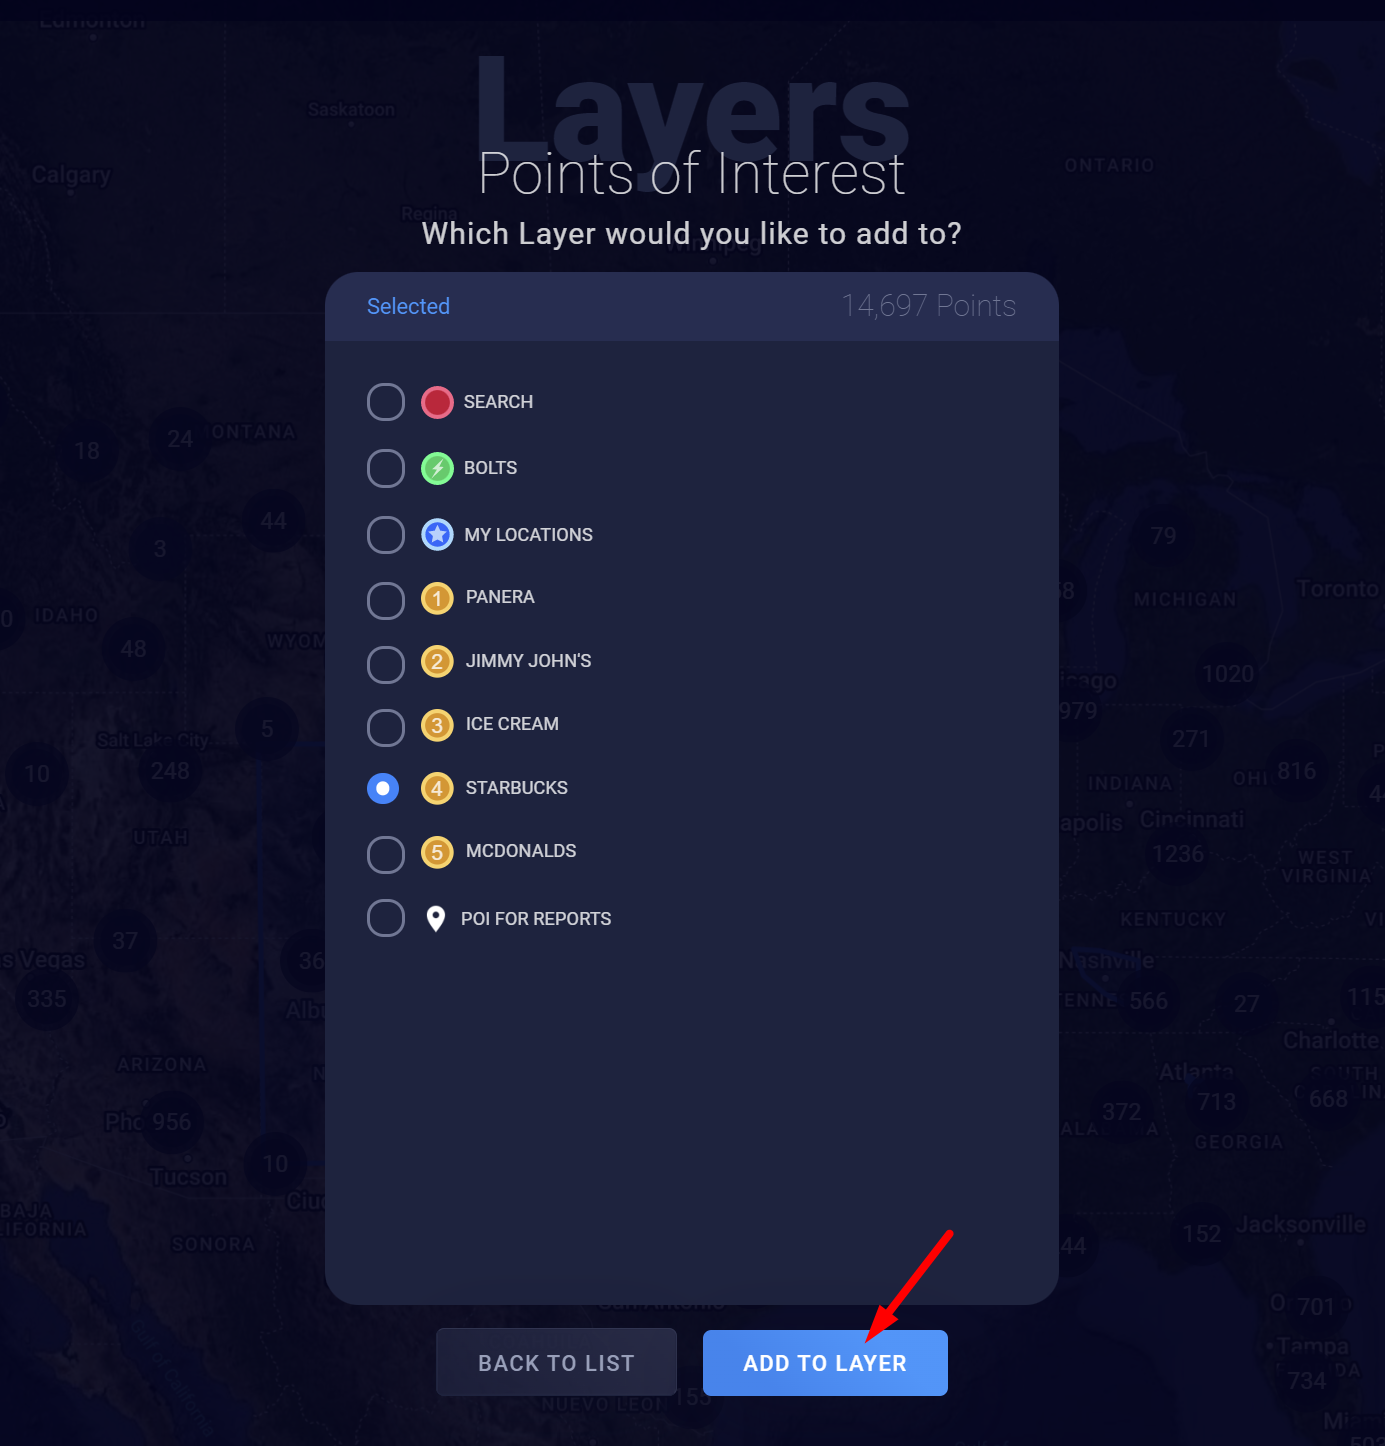
- Select the location pin in the search bar at the top-left corner of your screen to access the points-of-interest (POI) database.

- Search by name or category to locate the brand you'd like to import as a layer.
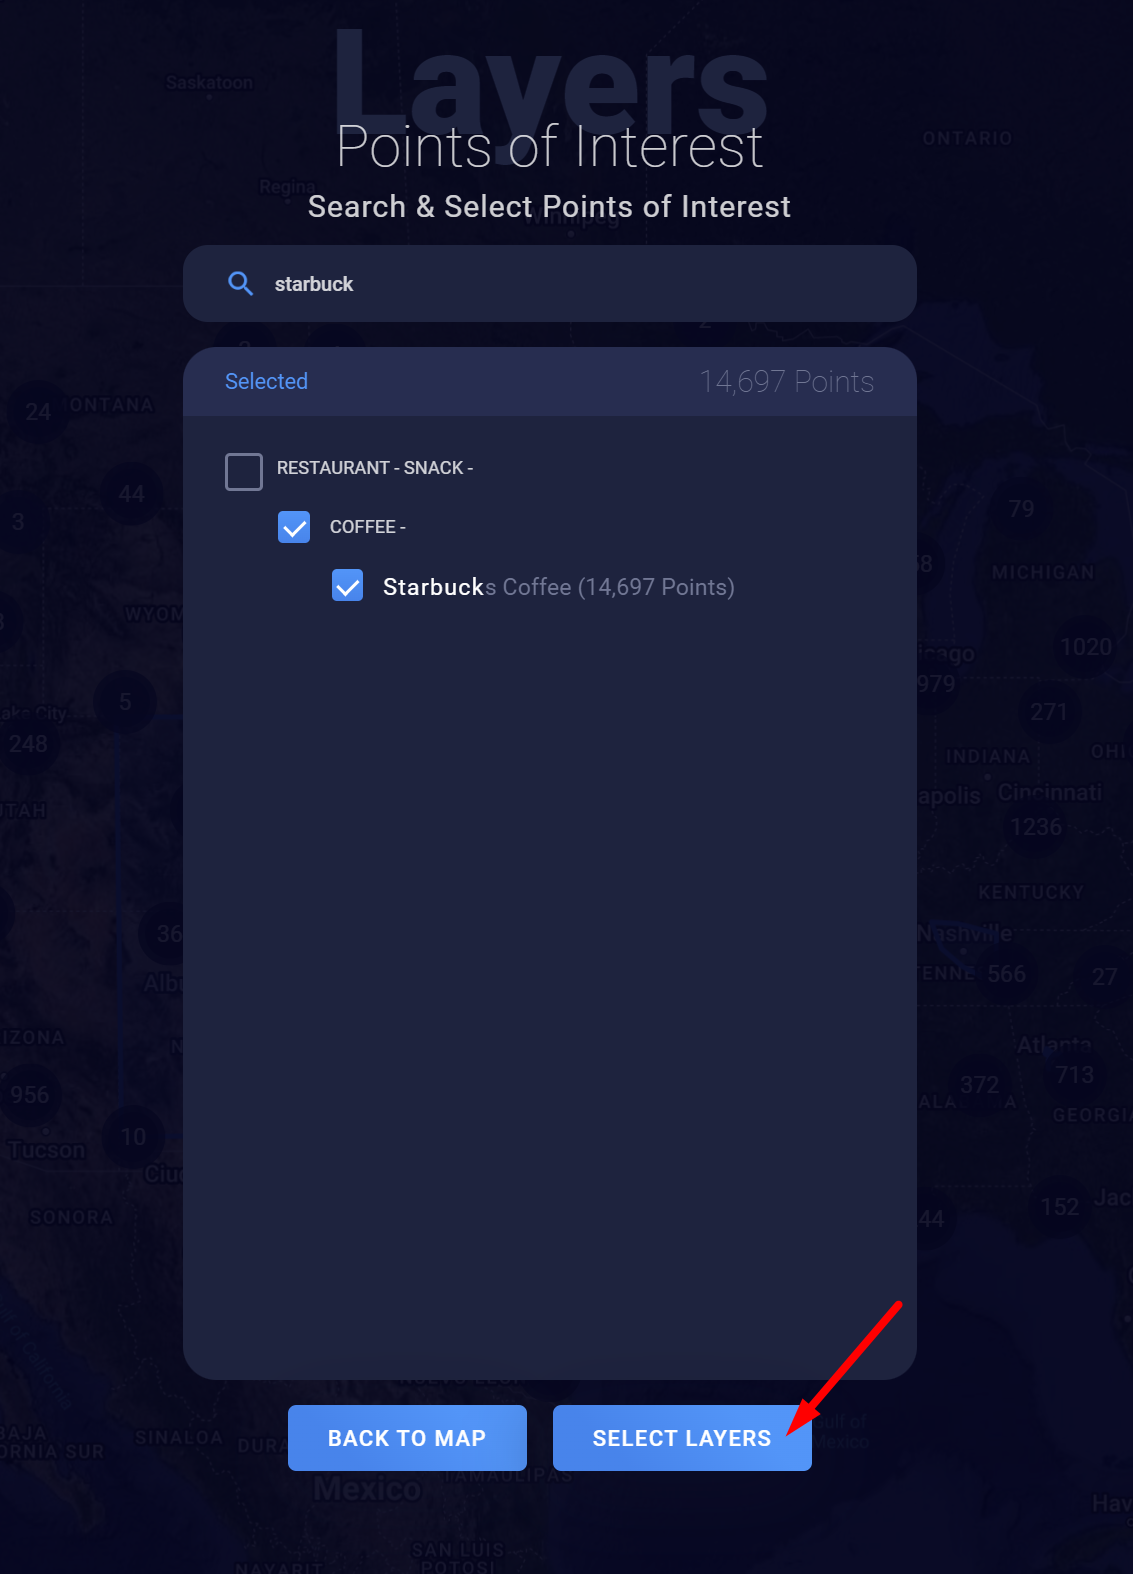
- Select the brand and make sure the number of sites listed for that brand matches the total count displayed at the top-right corner of the POI database.
- Click "Select Layers."
- Select the layer to which the sites are being added.
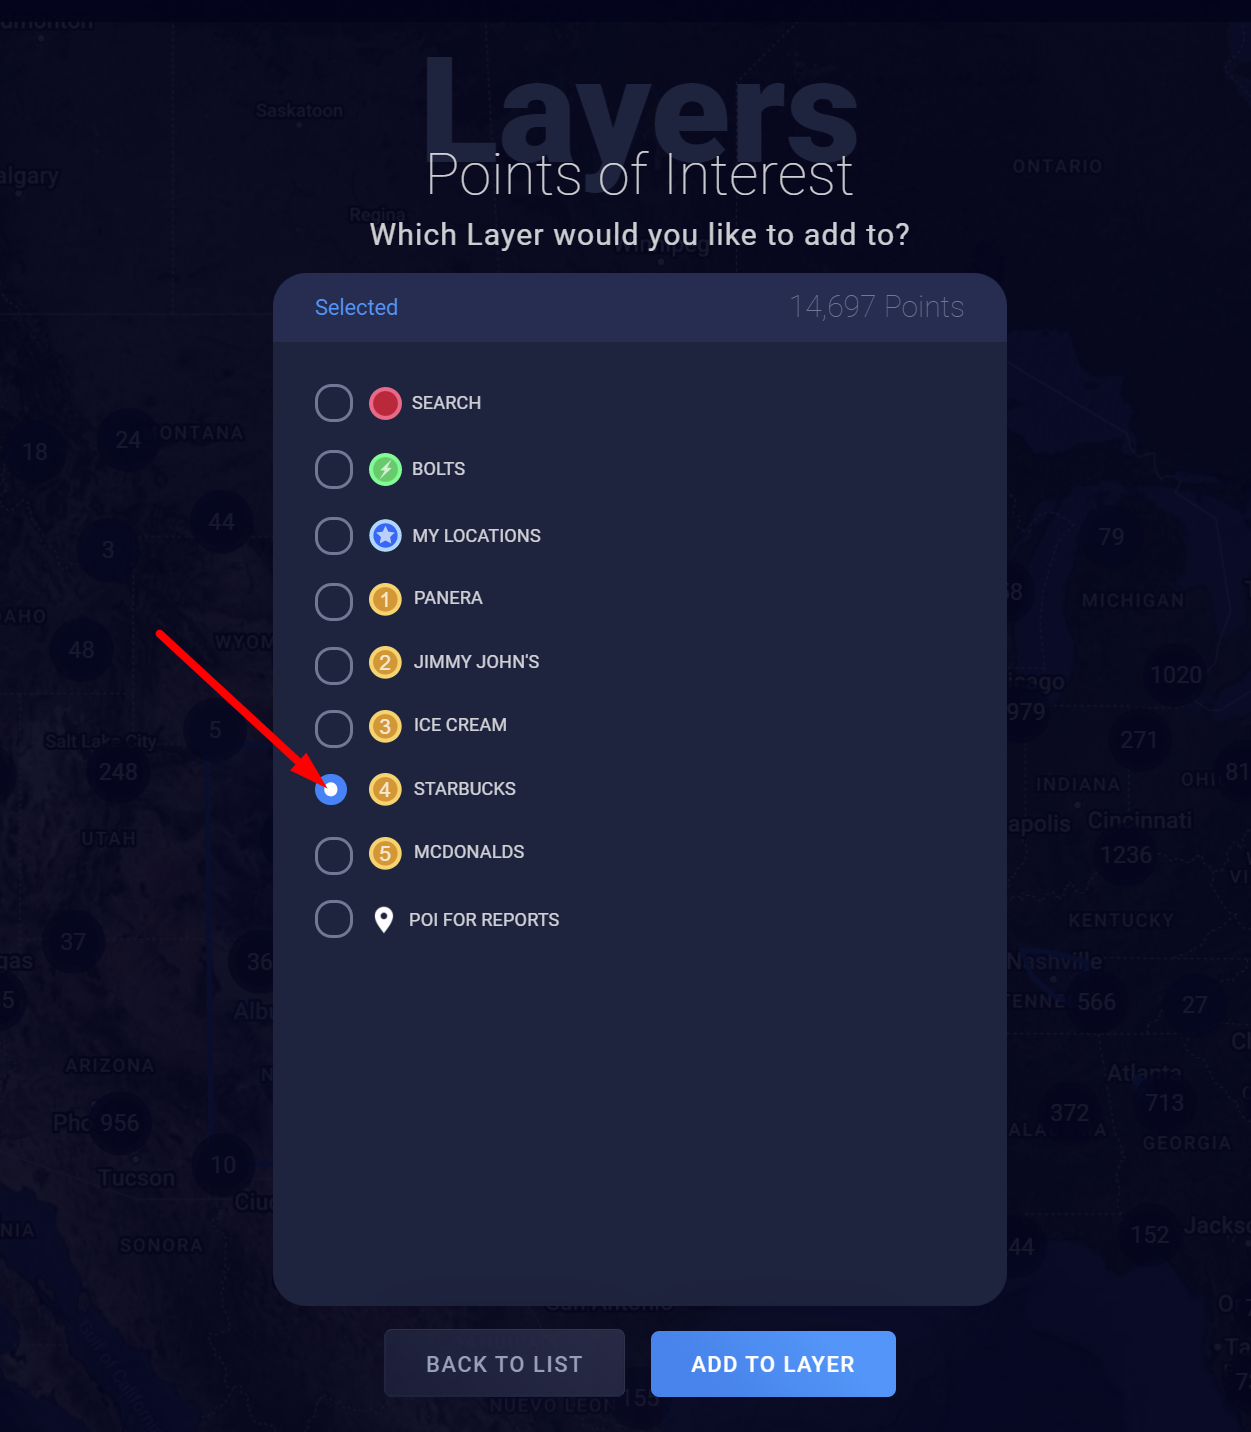
- Click "Add to Layer."
Tip: Once you've made all desired changes and imported your new project, ensure
- the counts for the layers and site attributes are correct and
- the imported data is accurate and loaded without error.