Adding Site Sonar points as Trade-Area Seeds
Viewing and analyzing Trade-Area Seeds
What is a Trade-Area Seed?
- A Trade-Area Seed represents a particular trade area; it is not a specific address for a proposed store location.
- You can use this site type as a placeholder for an area you're interested in or a location where you'd like to open a store but cannot yet do so.
- You can also use this site type to save Site Sonar locations by exporting the Site Sonar results and formatting/importing these sites into your model as Trade-Area Seeds.
- Trade-Area Seeds are also known as Market Calls in some organizations.
Note: The Trade-Area Seed is a type of Proposed Site. Learn more about site types.
How to add Site Sonar points as Trade-Area Seeds
- After using the revenue and distance thresholds to optimize your per-market revenue and site spacing, export your results using the Report function of Site Sonar.
- Open the downloaded file that contains your points of interest.
- Download and open the current data sheet from your project.
- Open the Main Menu.
- Click Import Sites.
- Click Download.
- Open the downloaded file.
- Once the current project file is open, clear all the content in the file except for the column headers in the first row of the sheet, then save the file in CSV format.
- Copy the relevant data (i.e., Name, Latitude, Longitude, Address, City, State, Postal Code) from the downloaded Site Sonar file to the relevant columns of the saved data sheet.
- Ensure the Name is formatted as you would like to see in the platform (e.g., Market Calls January 2022 | Existing Starbucks | Phoenix)
- Fill all the cells in the Country column with the appropriate country name (e.g., United States).
- Fill all the cells in the Layer column with *BOLT*
- Fill all the cells in the SiteType column with trade-area-seed

- Save this formatted file.
- Upload this newly saved data sheet to your current project.
- Ensure you have the correct project open for importation.
- Open the Main Menu.
- Click Import Sites.
- Click Upload.
- Check only Bolts.
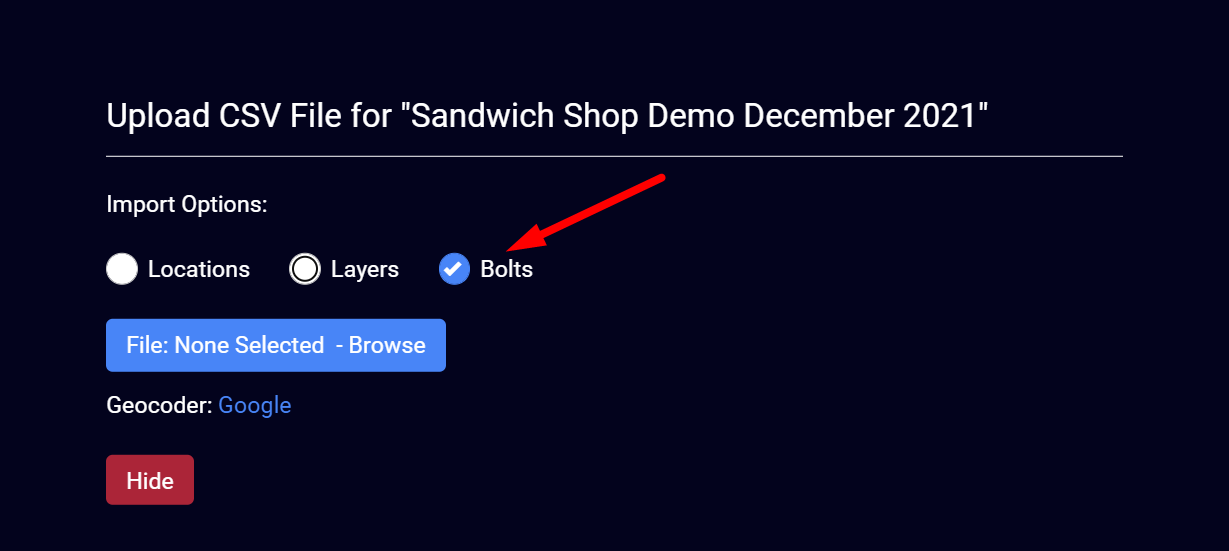
- Select File: None Selected — Browse.
- Locate and select the CSV file you want to upload.
- Once the file has finished processing, if no errors populate, click Finish.
Warning: Before importing this data sheet, make sure it follows the correct format and that the following columns have been left blank:
- Address2
- All revenue columns (those that start with "Revenue:")
- All attribute columns (those that start with "Attribute:")
- Note: Leaving the attribute columns blank will set these points to the default template of the project.
- LayerRevenues
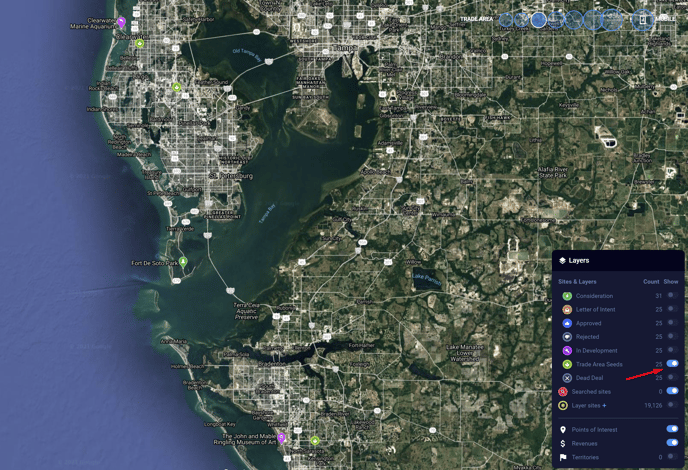
Viewing and analyzing Trade-Area Seeds
To view Trade-Area Seeds in a market on the map, toggle off all other site types in the Layers Bin:
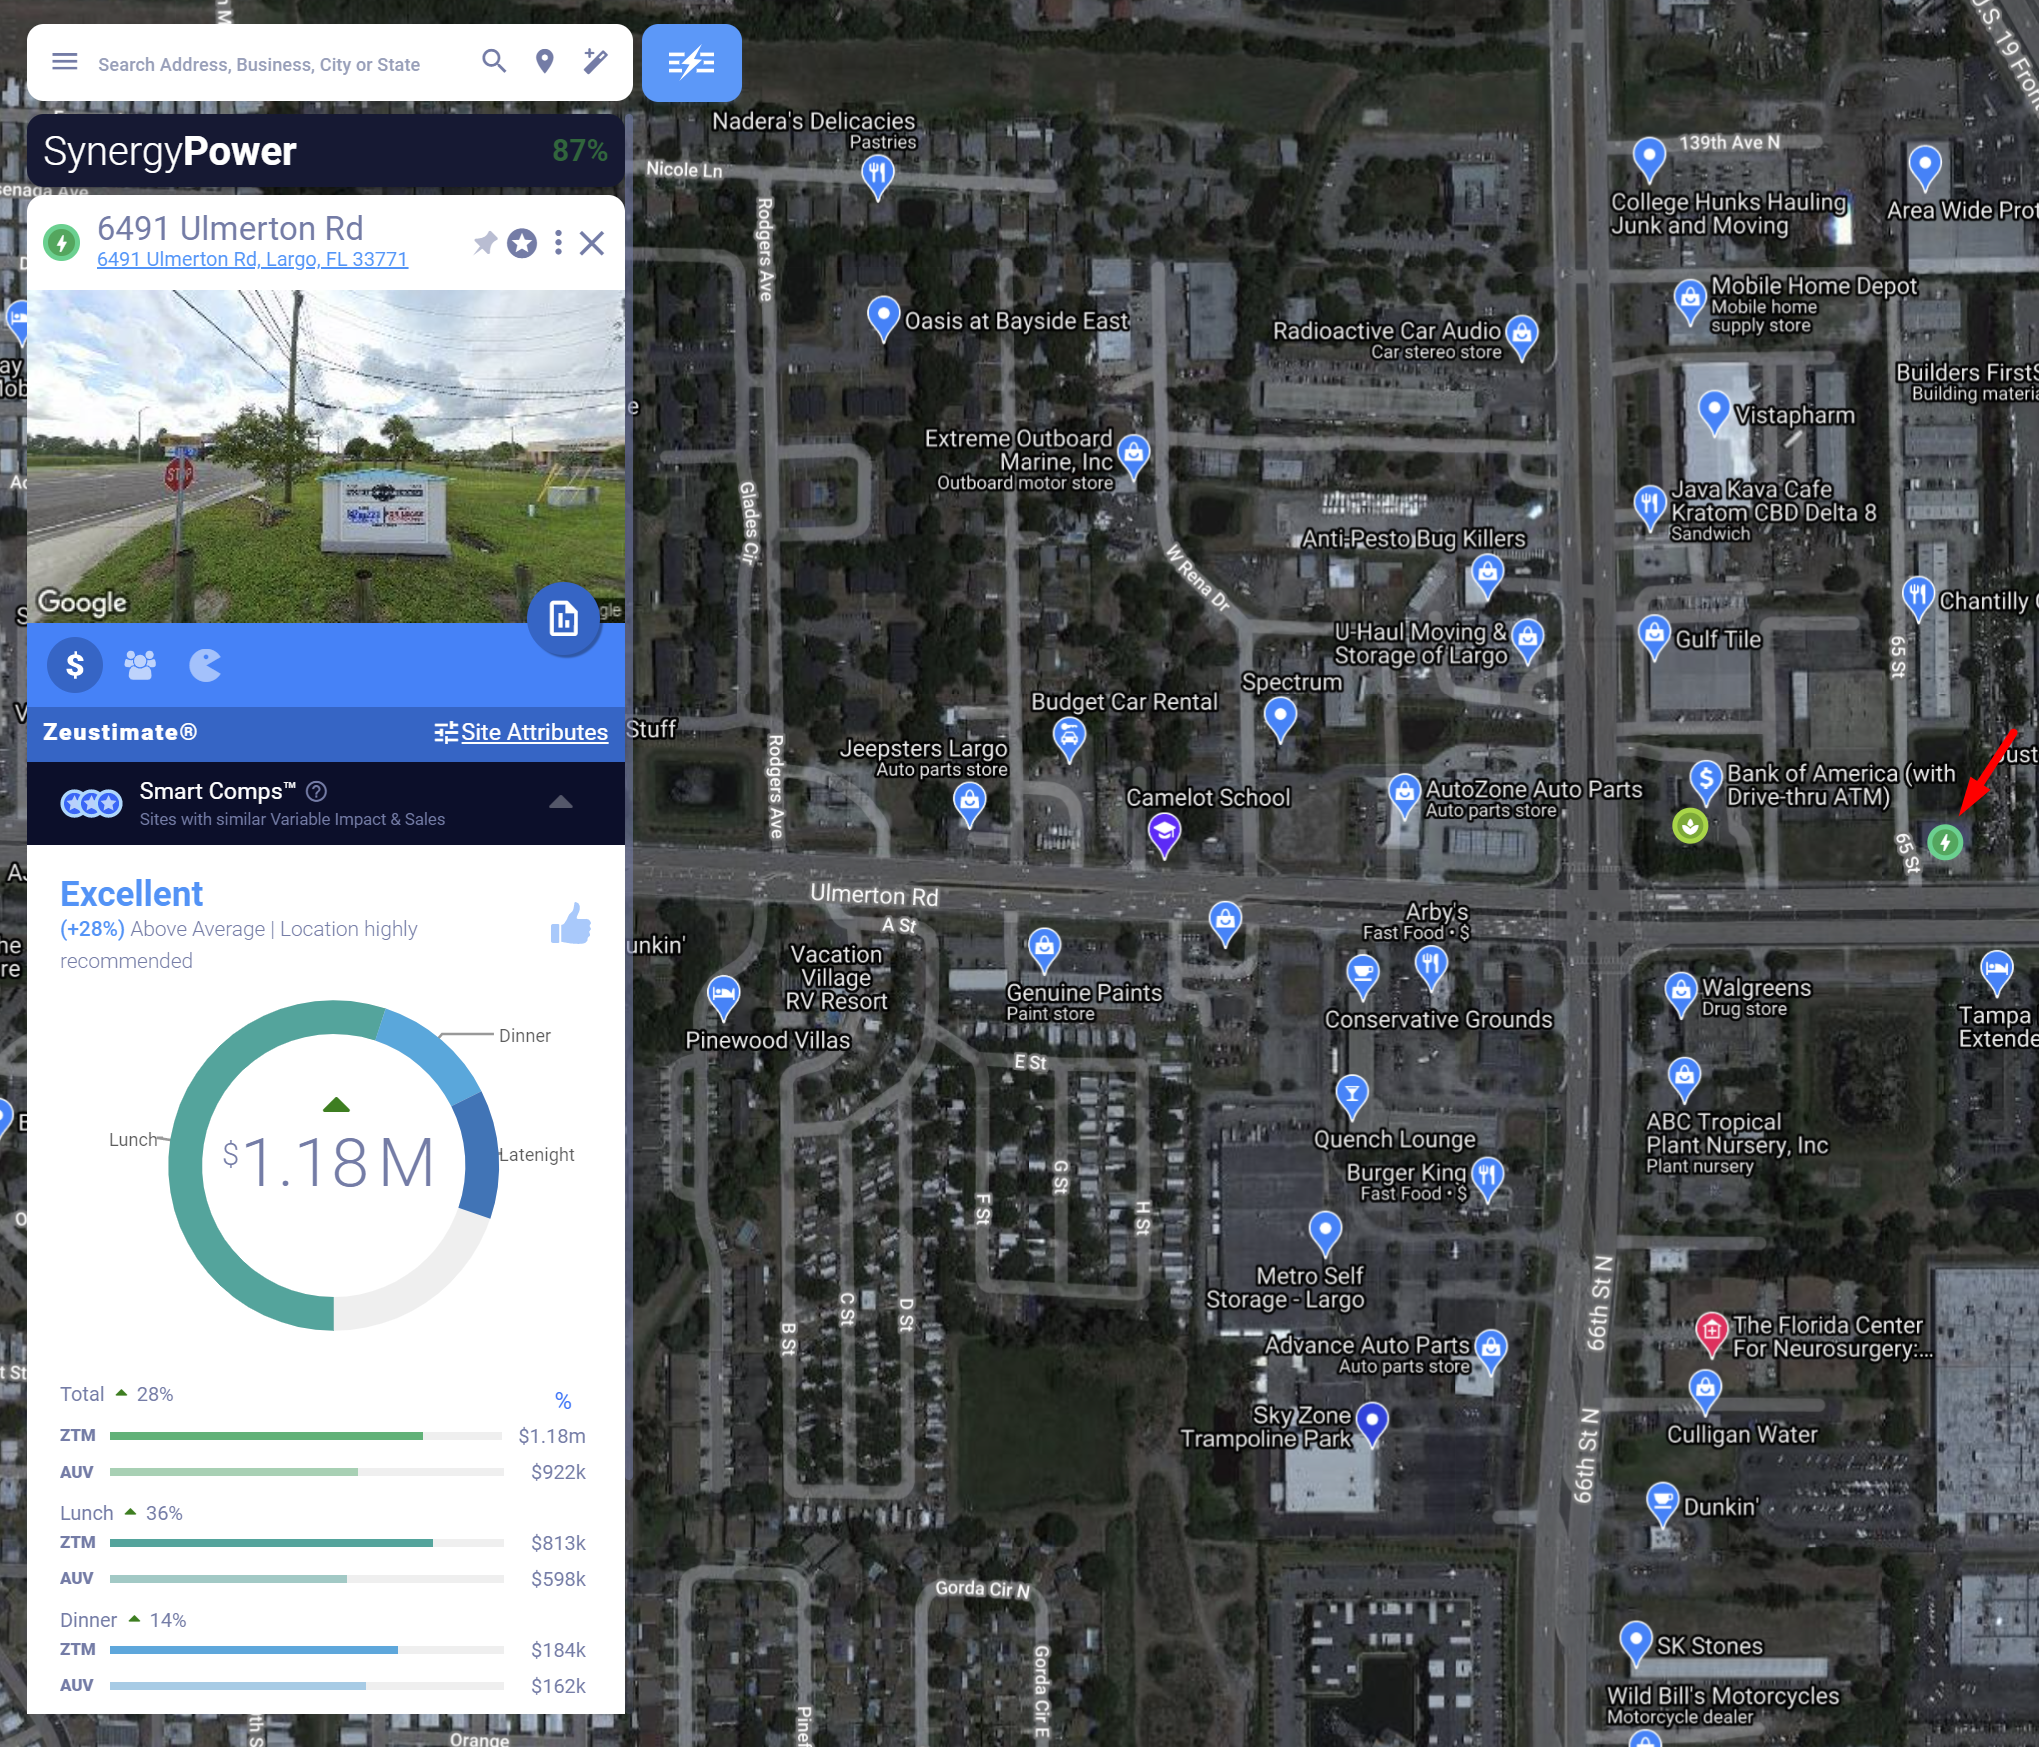
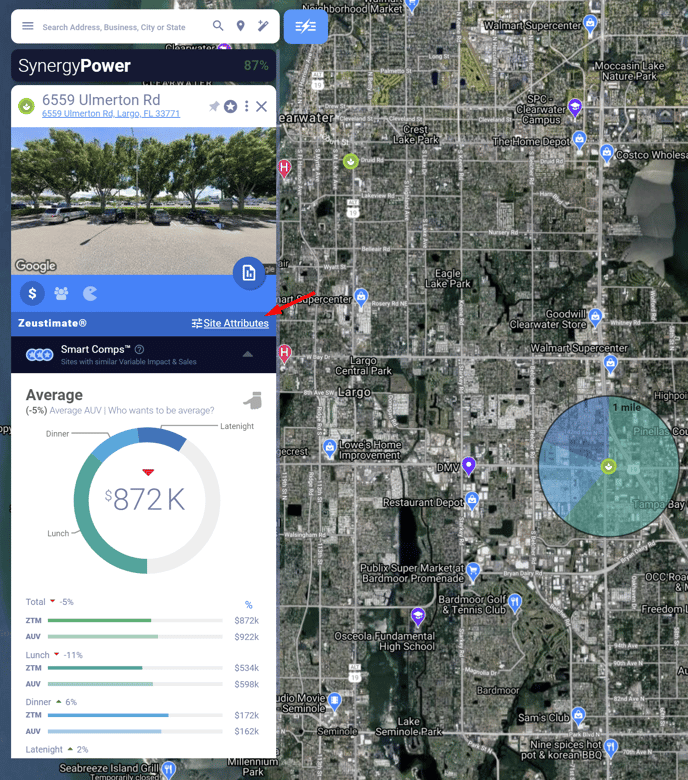
Quickly get a projection for a Trade-Area Seed by clicking on it.
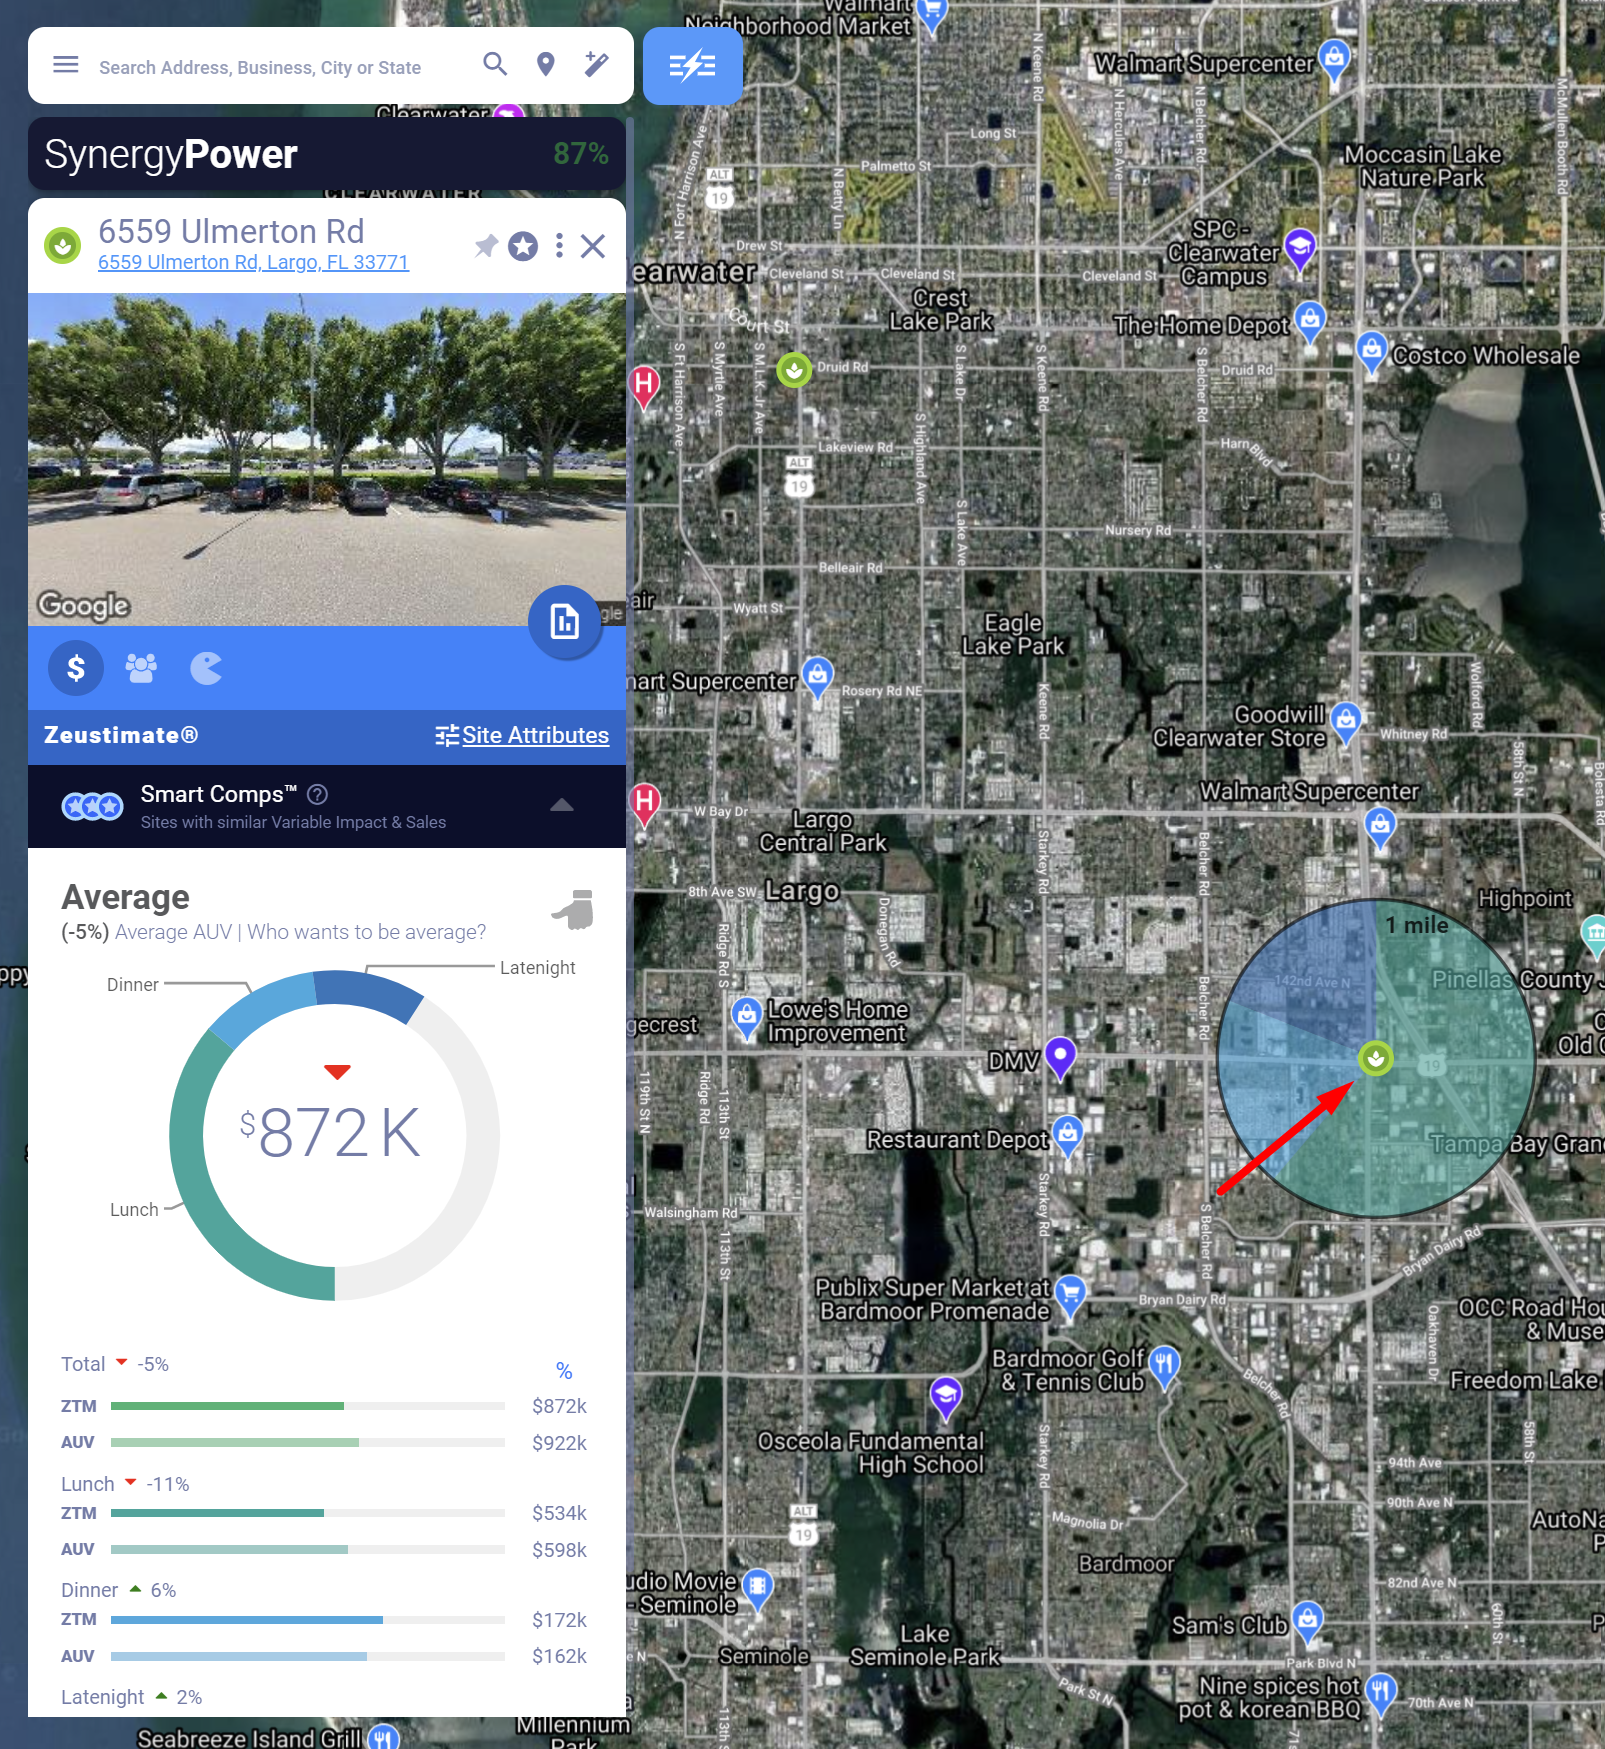
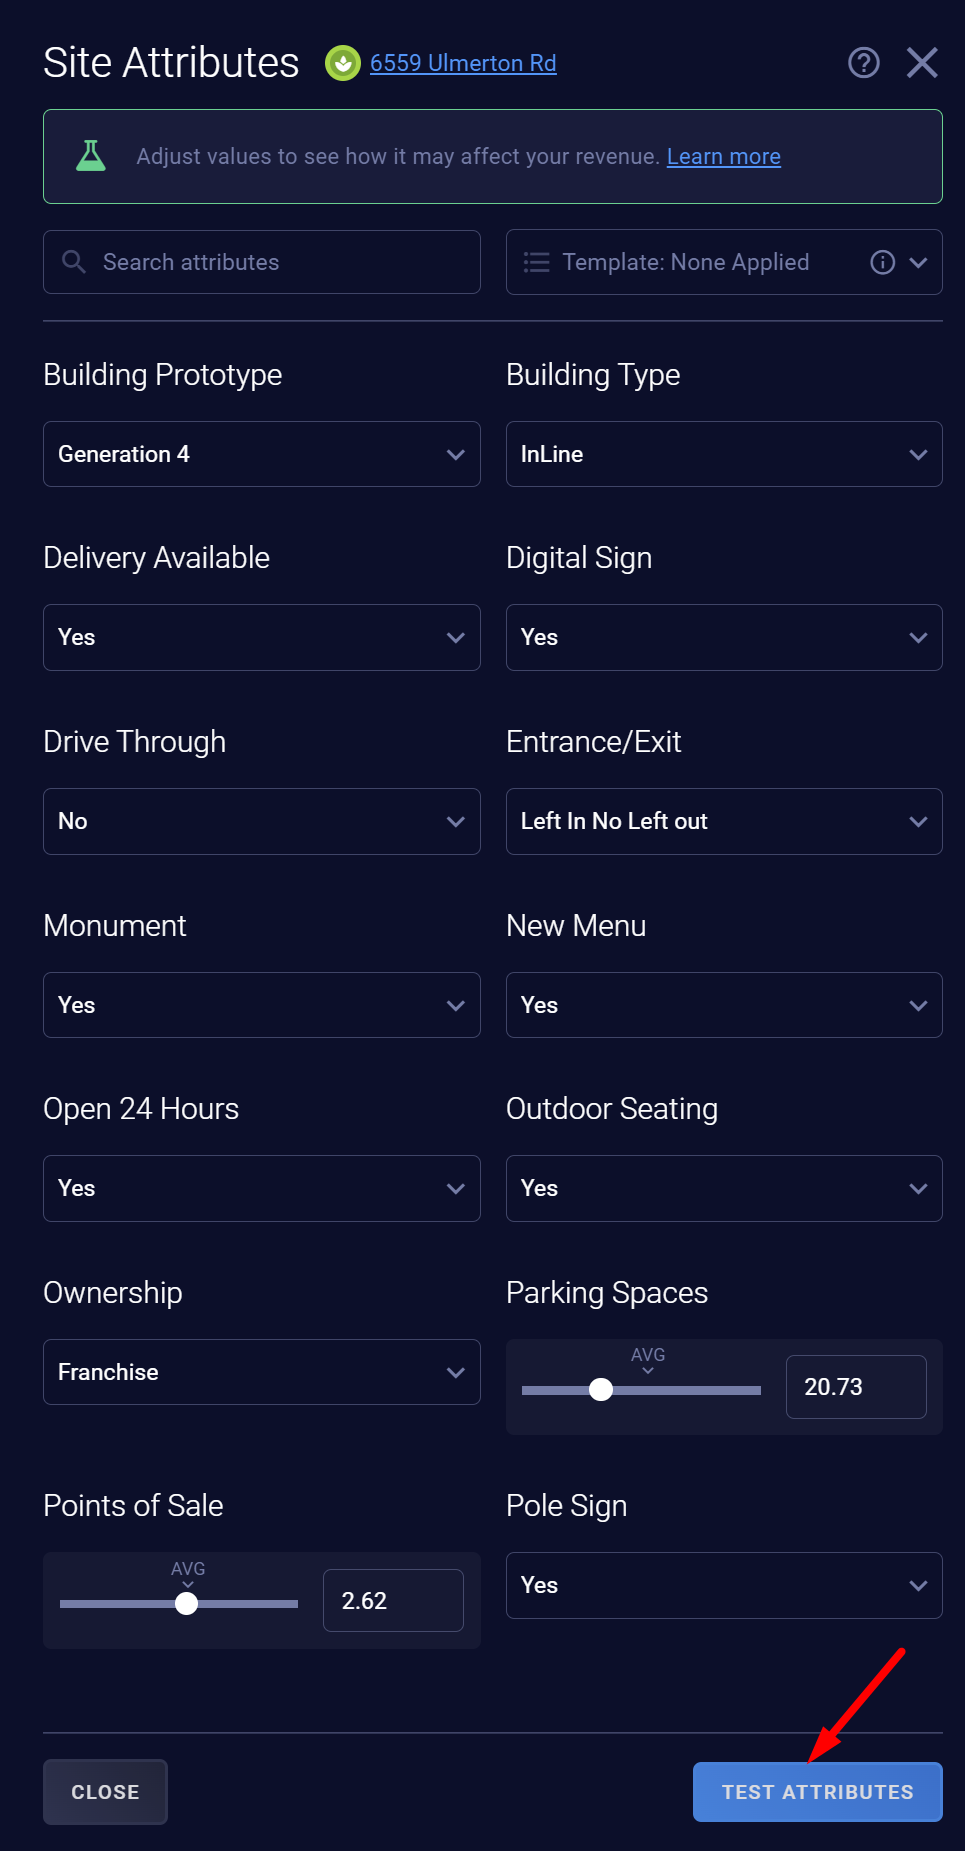
Adjust your attributes to test other templates or custom attribute settings.
Once a proposed site in the area becomes available, you can add that site to your project as a Consideration Site.