If you're subscribed to Custom Polygons, turning on the Polygons feature will enable a Polygons Toolbar which has many options you can use to customize shapes.
Using the Polygons Toolbar
To use most of the actions on the toolbar, you'll need to first select a shape or shapes.
It's good to know the difference between visualizing a shape and selecting it.
Visualized - The shape is visible on the map with a border and a light fill. In the panel, there's an eye icon that is white. You can toggle the visibility of the shape by clicking the eye icon in that shape's row.
Selected - The shape is visualized on the map but the fill is heavier. In the panel, there's a checkbox which is checked. You can toggle the selected state by either clicking the shape on the map or the checkbox in that shape's row.
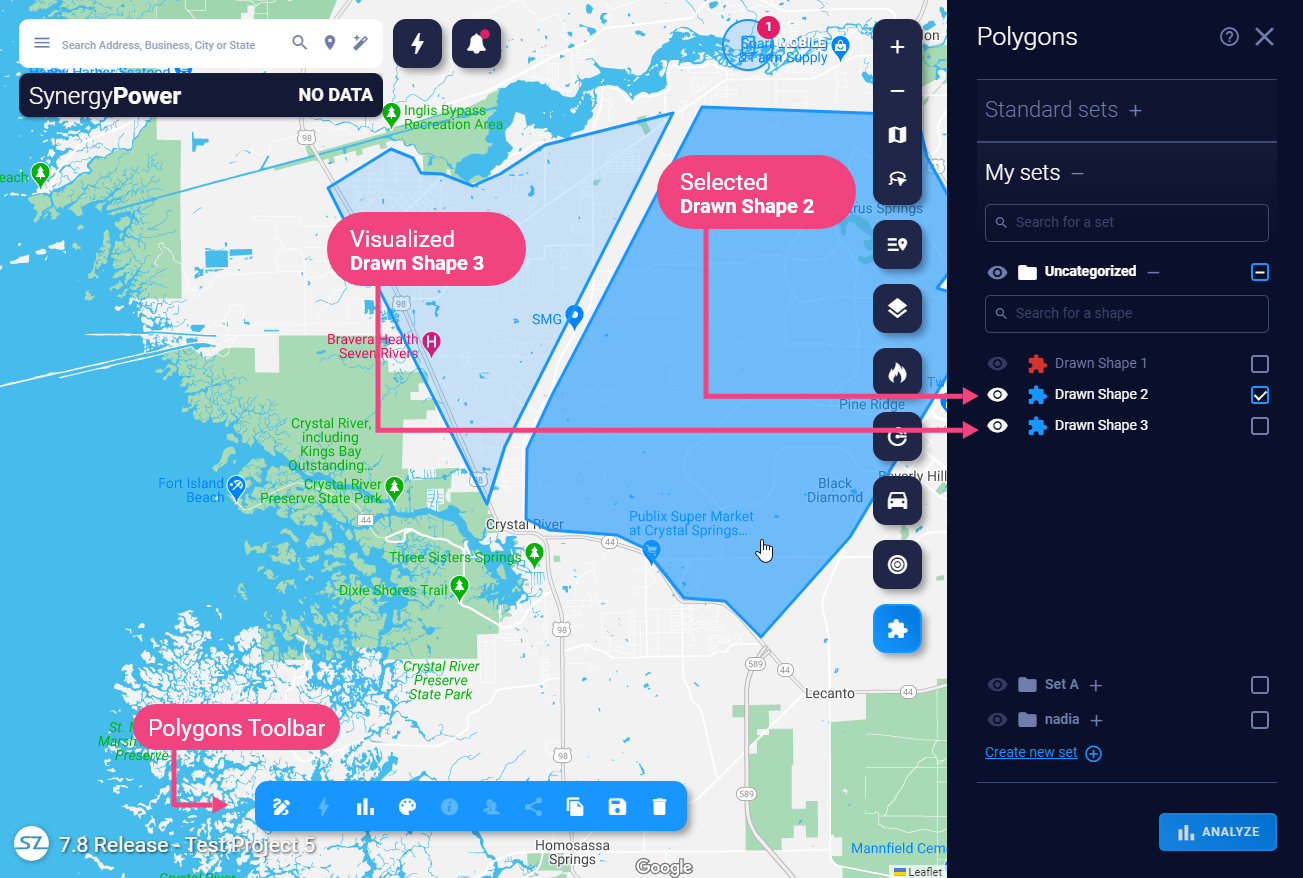
In the above example, Drawn Shape 2 is selected.
Drawn Shape 3 is only visualized.
You can see that the Analyze, Color, Move, Copy, and Delete actions on the toolbar are enabled because Drawn Shape 2 is selected. Any one of these actions will apply to Drawn Shape 2.
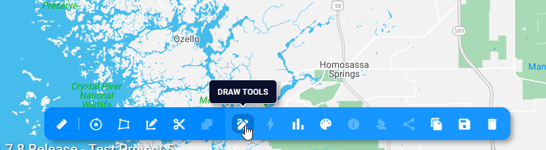
Draw tools
The toolbar's left section is for working with drawn shapes. The toolbar isn't expanded by default. You can press Draw Tools to toggle the draw tools section open or closed.
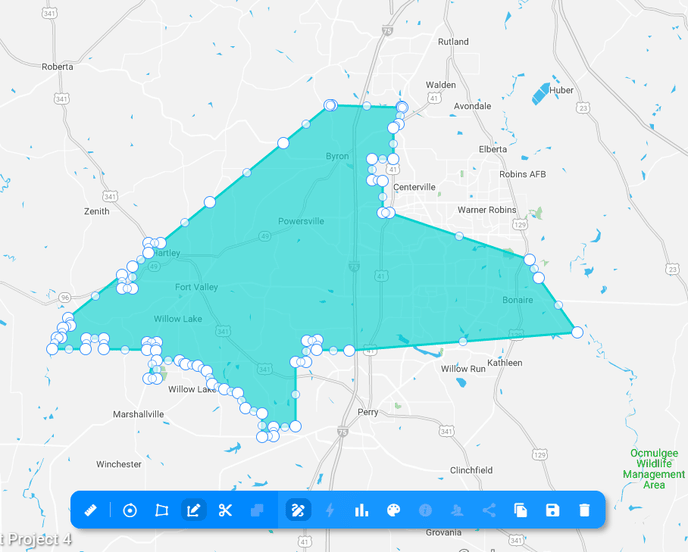
Draw a polygon
- Expand the Draw tools section of the Polygons toolbar by pressing the Draw tools action.
- Press Draw a Polygon.
- Start drawing on the map and once your shape completes, it will save the shape to your currently open My Set, or Uncategorized.
- A Save popup will appear letting you know you can rename it or save it elsewhere. This is an optional step. If you cancel, the shape will still be saved in either your open set, or the Uncategorized set.
Draw a circle
- Expand the Draw tools section of the Polygons toolbar by pressing the Draw tools action.
- Press Draw a Circle.
- On the map, press once to place the radius, then drag outwards and click again to finish the circle.
Edit a shape
You can edit the bounds of your polygon shape or circle.
- Expand the Draw tools section of the Polygons toolbar by pressing the Draw tools action.
- Select a shape from My Sets to edit. You can't edit Standard shapes, but you can make a copy first.
- Press Edit a shape on the toolbar, and now you can begin to move points on a polygon shape, or adjust the radius of a circle.
- When you're done editing, press Save on the toolbar.
Removing points on a shape
While in edit mode, you can also remove points to simplify your shape. Simply right-click the points to remove them.
Cut a shape
- Expand the Draw tools section of the Polygons toolbar by pressing the Draw tools action.
- Select a polygon from My Sets to cut.
- Press the scissors Cut a shape action on the toolbar.
- Now you can draw a shape inside your selected shape in order to cut a piece out of it.
- Cutting a shape will save automatically.
Merge shapes
Merge polygons by selecting multiple shapes, and pressing Merge in the toolbar. A new shape will be formed. You can go on to do additional actions on the new shape.
Note: You can't merge circles at this time.
Measure
By pressing Measure in the Polygons Toolbar, you'll see the real-time measurements between two points as you draw shapes. This works with Draw a polygon, and Draw a circle.
- Expand the Draw tools section of the Polygons toolbar by pressing the Draw tools action.
- Press Measure.
- A box will show with the measurements of the shapes you draw.
- Press Measure again to turn it off.
Other actions
Analyzing sets and shapes
- Click the Analyze button to launch the Analyze Shape panel and study the selected shapes’ demographics and layers.
- Use the checkboxes to add or remove shapes from the analysis. For example, if you need to meet a certain population criterion, adjust your shape selections until that value is met.
Color
Color shapes or sets so they're easier to differentiate on the map.
- With one or more shapes from My Sets selected, press Color on the Polygons Toolbar.
- You can choose between several colors to change your shapes to. If you select a set, it will assign a color to all the shapes in the set so that any new polygons you draw or import will inherit that color.

Move
Move one or more shapes from one set to another.
- Select one or more shapes from My Sets
- From the polygons toolbar, press Move or Copy
- A popup appears letting you choose between a move or copy
- Choose the Move radio button.
- You can rename the shape in this step if there's only one shape selected.
- Choose the destination set for the shape.
- Press Move.
- The new shape will be moved to the set you chose as long as the name of the shape is unique. If it's not, it will ask you to rename it before you can try to move it again.
Copy
Copy shape(s) into another set, or copy a whole set. You can also copy Standard Sets or shapes to be able to edit or share them.
- Select one or more shapes from Standard Sets or My Sets.
- From the polygons toolbar, press Move or Copy
- A popup appears letting you choose between a move or copy
- Choose the Copy radio button.
- You can rename the shape in this step if there's only one shape selected.
- Choose the destination set for the shape.
- If you've selected all the shapes in the set, there's a choice to either copy all the shapes or the whole set.
- Press Copy.
- The new shapes will be moved to the set you chose, or if you copied a whole set, you'll see the set at the top of My Sets.
Save
Save a shape you've recently edited to make sure the changes are updated.
You can access the Save feature in two ways:
- After drawing a shape, the Save popup will appear asking if you'd like to name it or save it somewhere besides the default location.
- If you cancel it, it will save in your currently open My Set or Uncategorized set.
- Pressing the Save button on the toolbar - If you have just edited a shape, you have the option to Save which will save the current changes to your shape as it is, or you can Save As if you want to also rename or save the shape elsewhere.
Delete
Delete a shape, shapes, or a set.
- Select a shape, shapes, or a set.
- From the polygons toolbar, press Delete.
- You can delete any set inside My Sets except Uncategorized.
- Press Delete.
- The shape(s) or set will be removed.
Share
To view or change who a set is shared with:
- Select one custom set that you own
- Press Share in the Polygons Toolbar
- Check some users or franchise groups to share the set with
- Choose whether or not to allow users to add their own shapes to the set
- Press Share
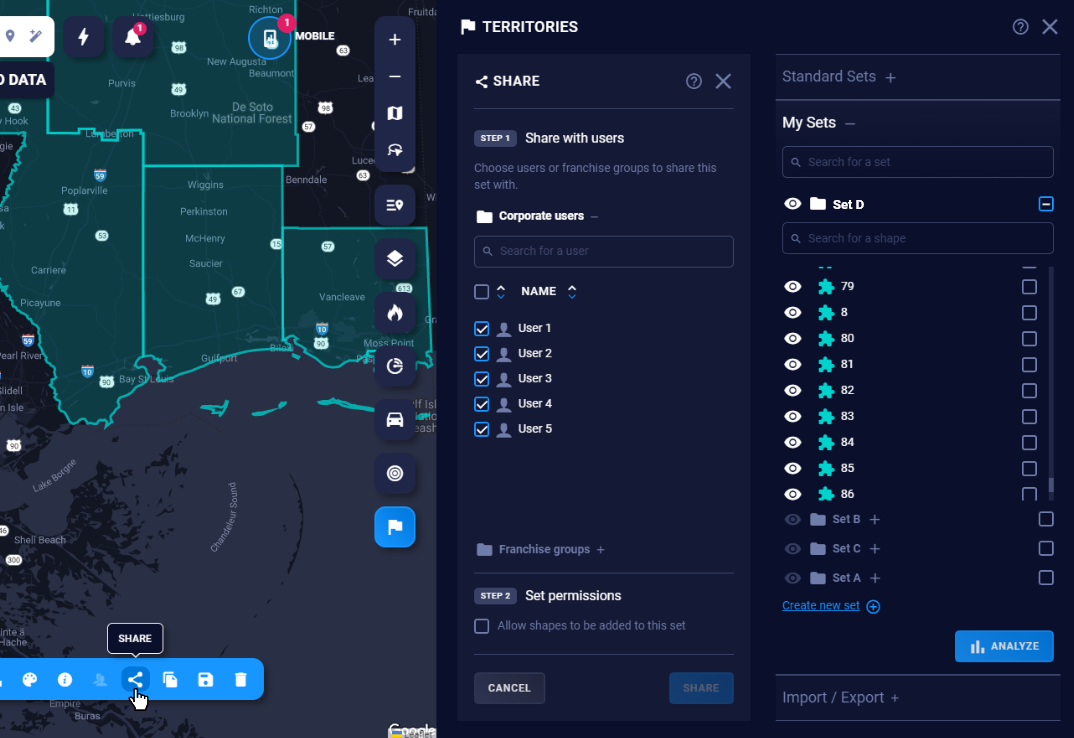
The users checked will now be able to see this set in their own SiteZeus account.
- They will have read-only access to these shapes while the set is shared with them
- If you need to remove access to the shapes, you can uncheck the users here and update it. Any shapes those users created in your set will now belong to you.
Notes
To add, edit or delete notes:
- Select one custom shape
- Press Notes in the Polygons Toolbar
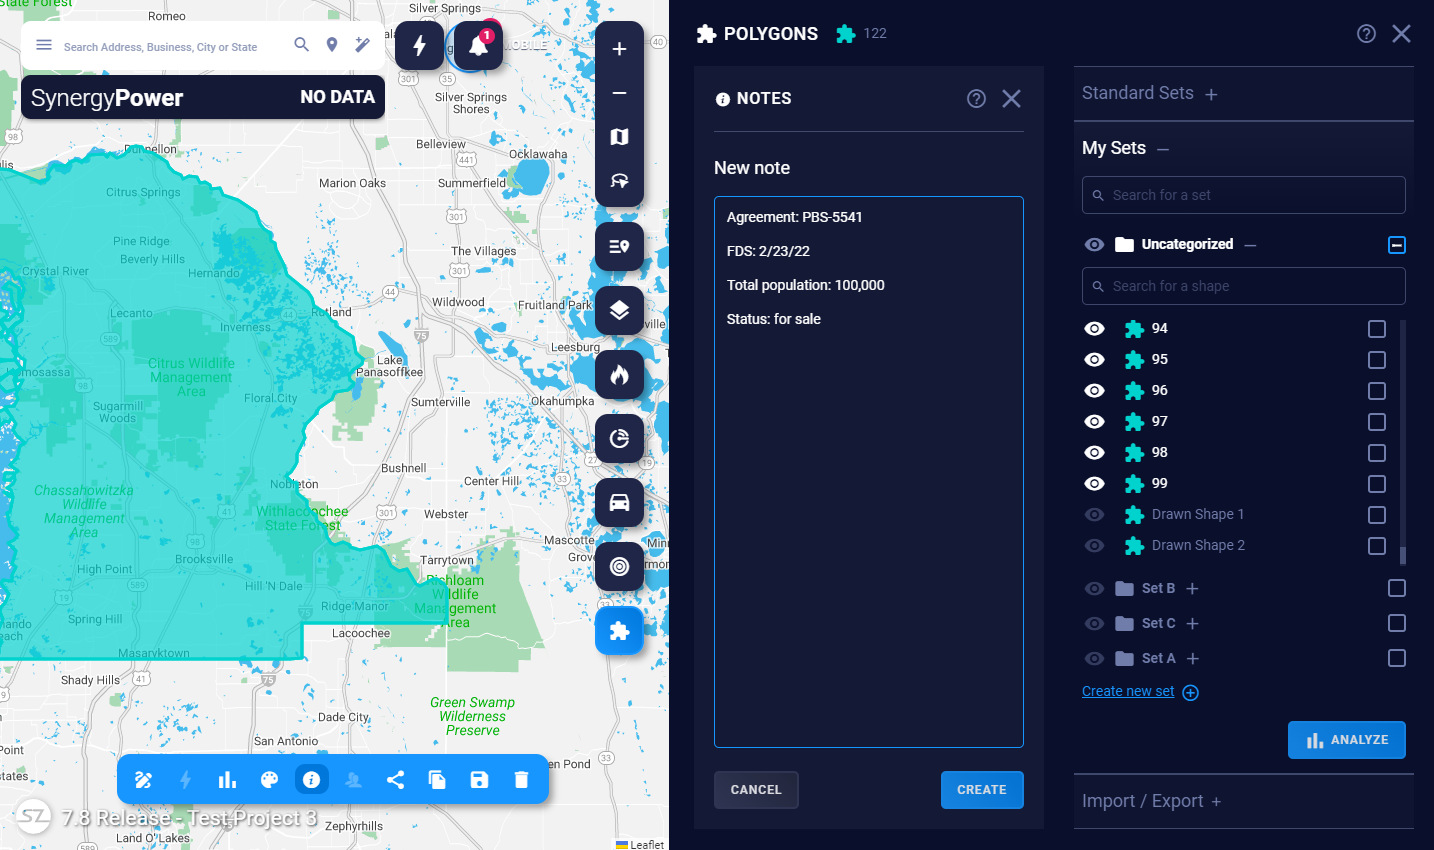
Create a new note
- Follow the steps above to enter the Notes feature.
- Press New Note
- Add details to the text area, and then to save it, press Create
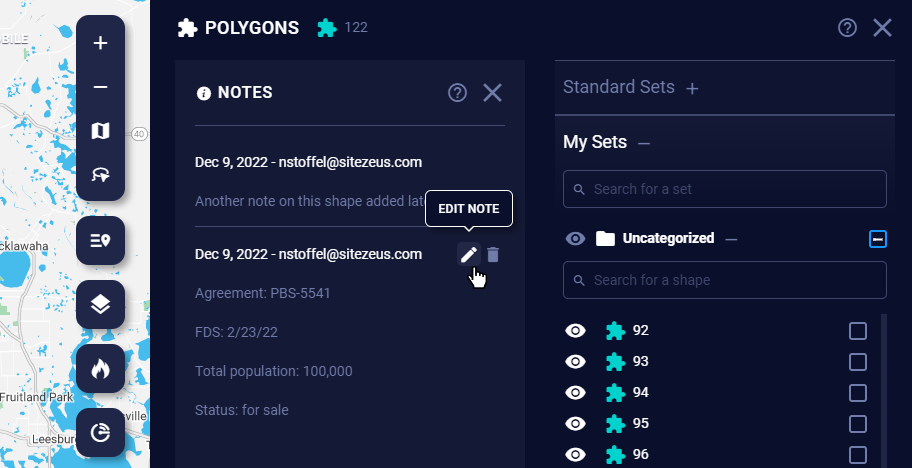
Edit an existing note
- Follow the steps above to enter the Notes feature.
- In the list of notes, hover a note you'd like to edit
- Press the Edit button
- You can now edit the note, and press Update when you'r ready to save
Delete a note
- Follow the steps above to enter the Notes feature.
- In the list of notes, hover a note you'd like to delete
- Press the Delete button
- After confirming, the note will be deleted
Note: In the near future, you will also be able to see other users' notes on shapes. You will only be able to edit or delete your own notes though.