The Site Panel allows you to find sites, navigate to them quickly, review and make changes to revenue and attribute data. Changes made to data in the site panel are permanent.
Accessing the Site Panel
Option #1 - Menu Access
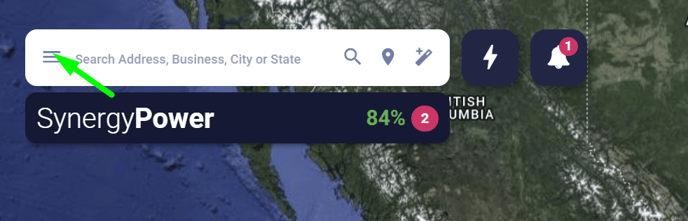
- Begin by clicking on the three lined icon on the top left of your screen (inside the searchbar on the left). We like to refer to this as the "Hamburger Menu".
- This will open the project panel menu on the left of your screen.
- Select Sites from the menu.
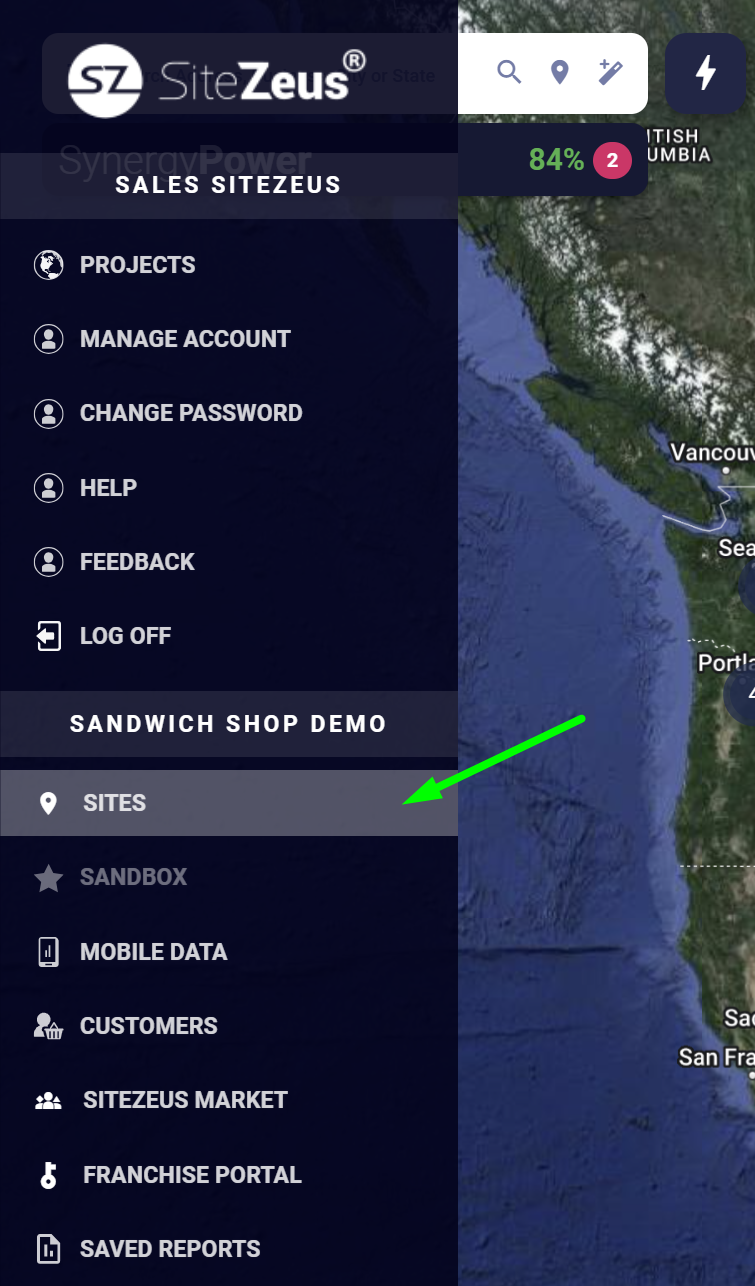
- This will open the Project Sites panel on the right of your screen.
Option #2 - Toolbar Access
- Select the POI icon from the toolbar on the right side of the map.
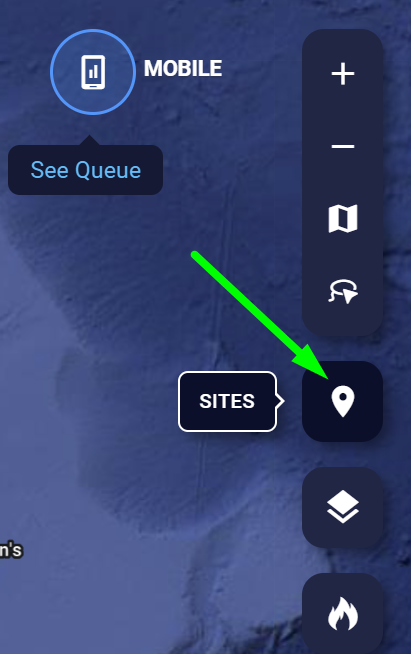
- This will open the Project Sites panel on the right of your screen.
Filter sites by pin type
The Switch List Selector at the top of your screen will allow you to switch which pin data you are viewing.
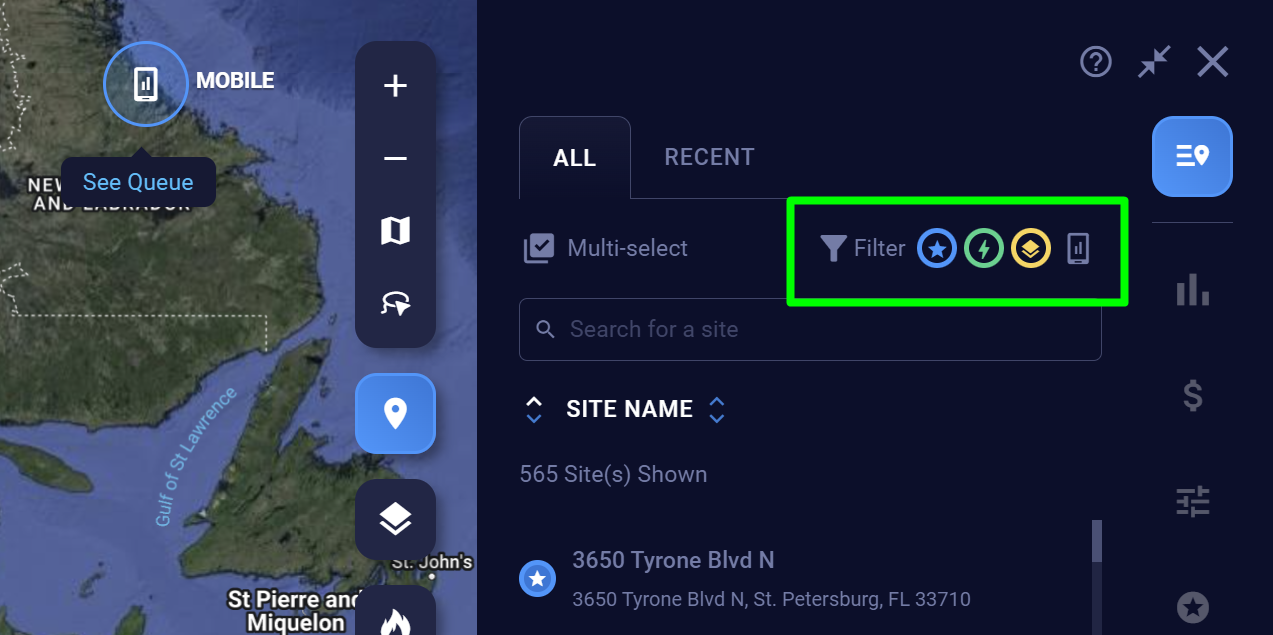
Filter sites by site name or address
Filter sites further by using the following methods.
- Filter by site name or address
Start typing a site name or address.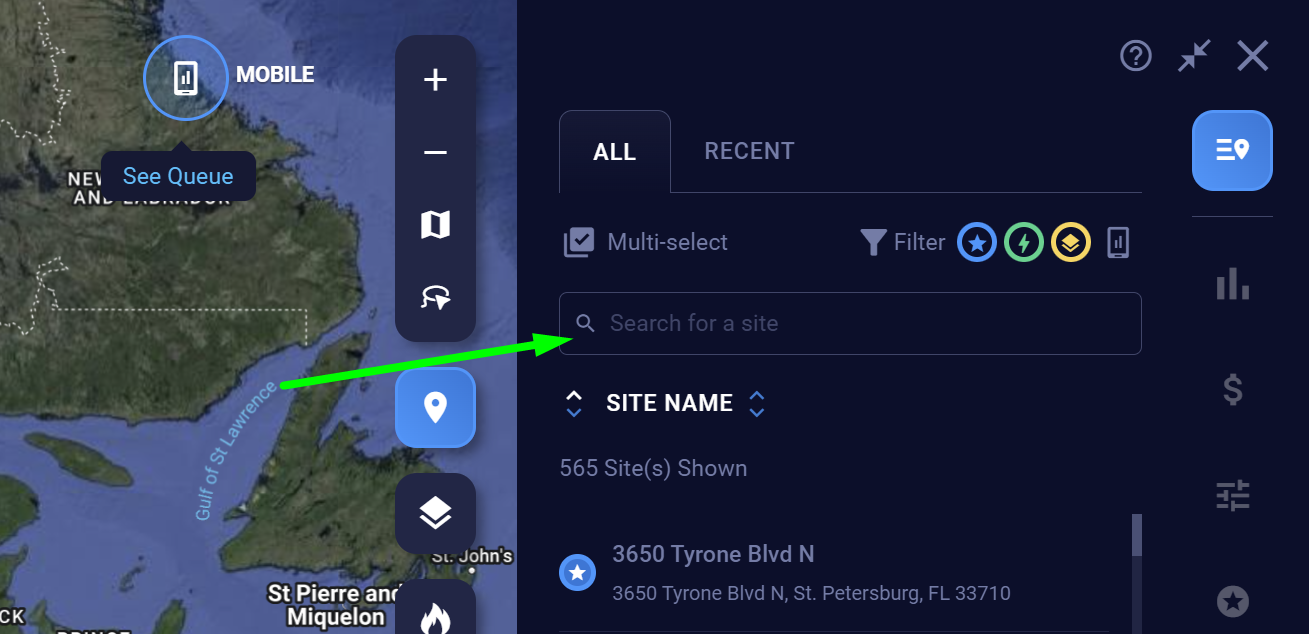
- Filter by Mobile Data
Only show sites in your chosen pin type that have associated Mobile Data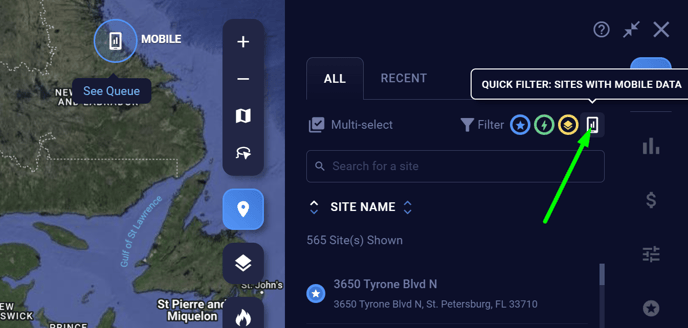
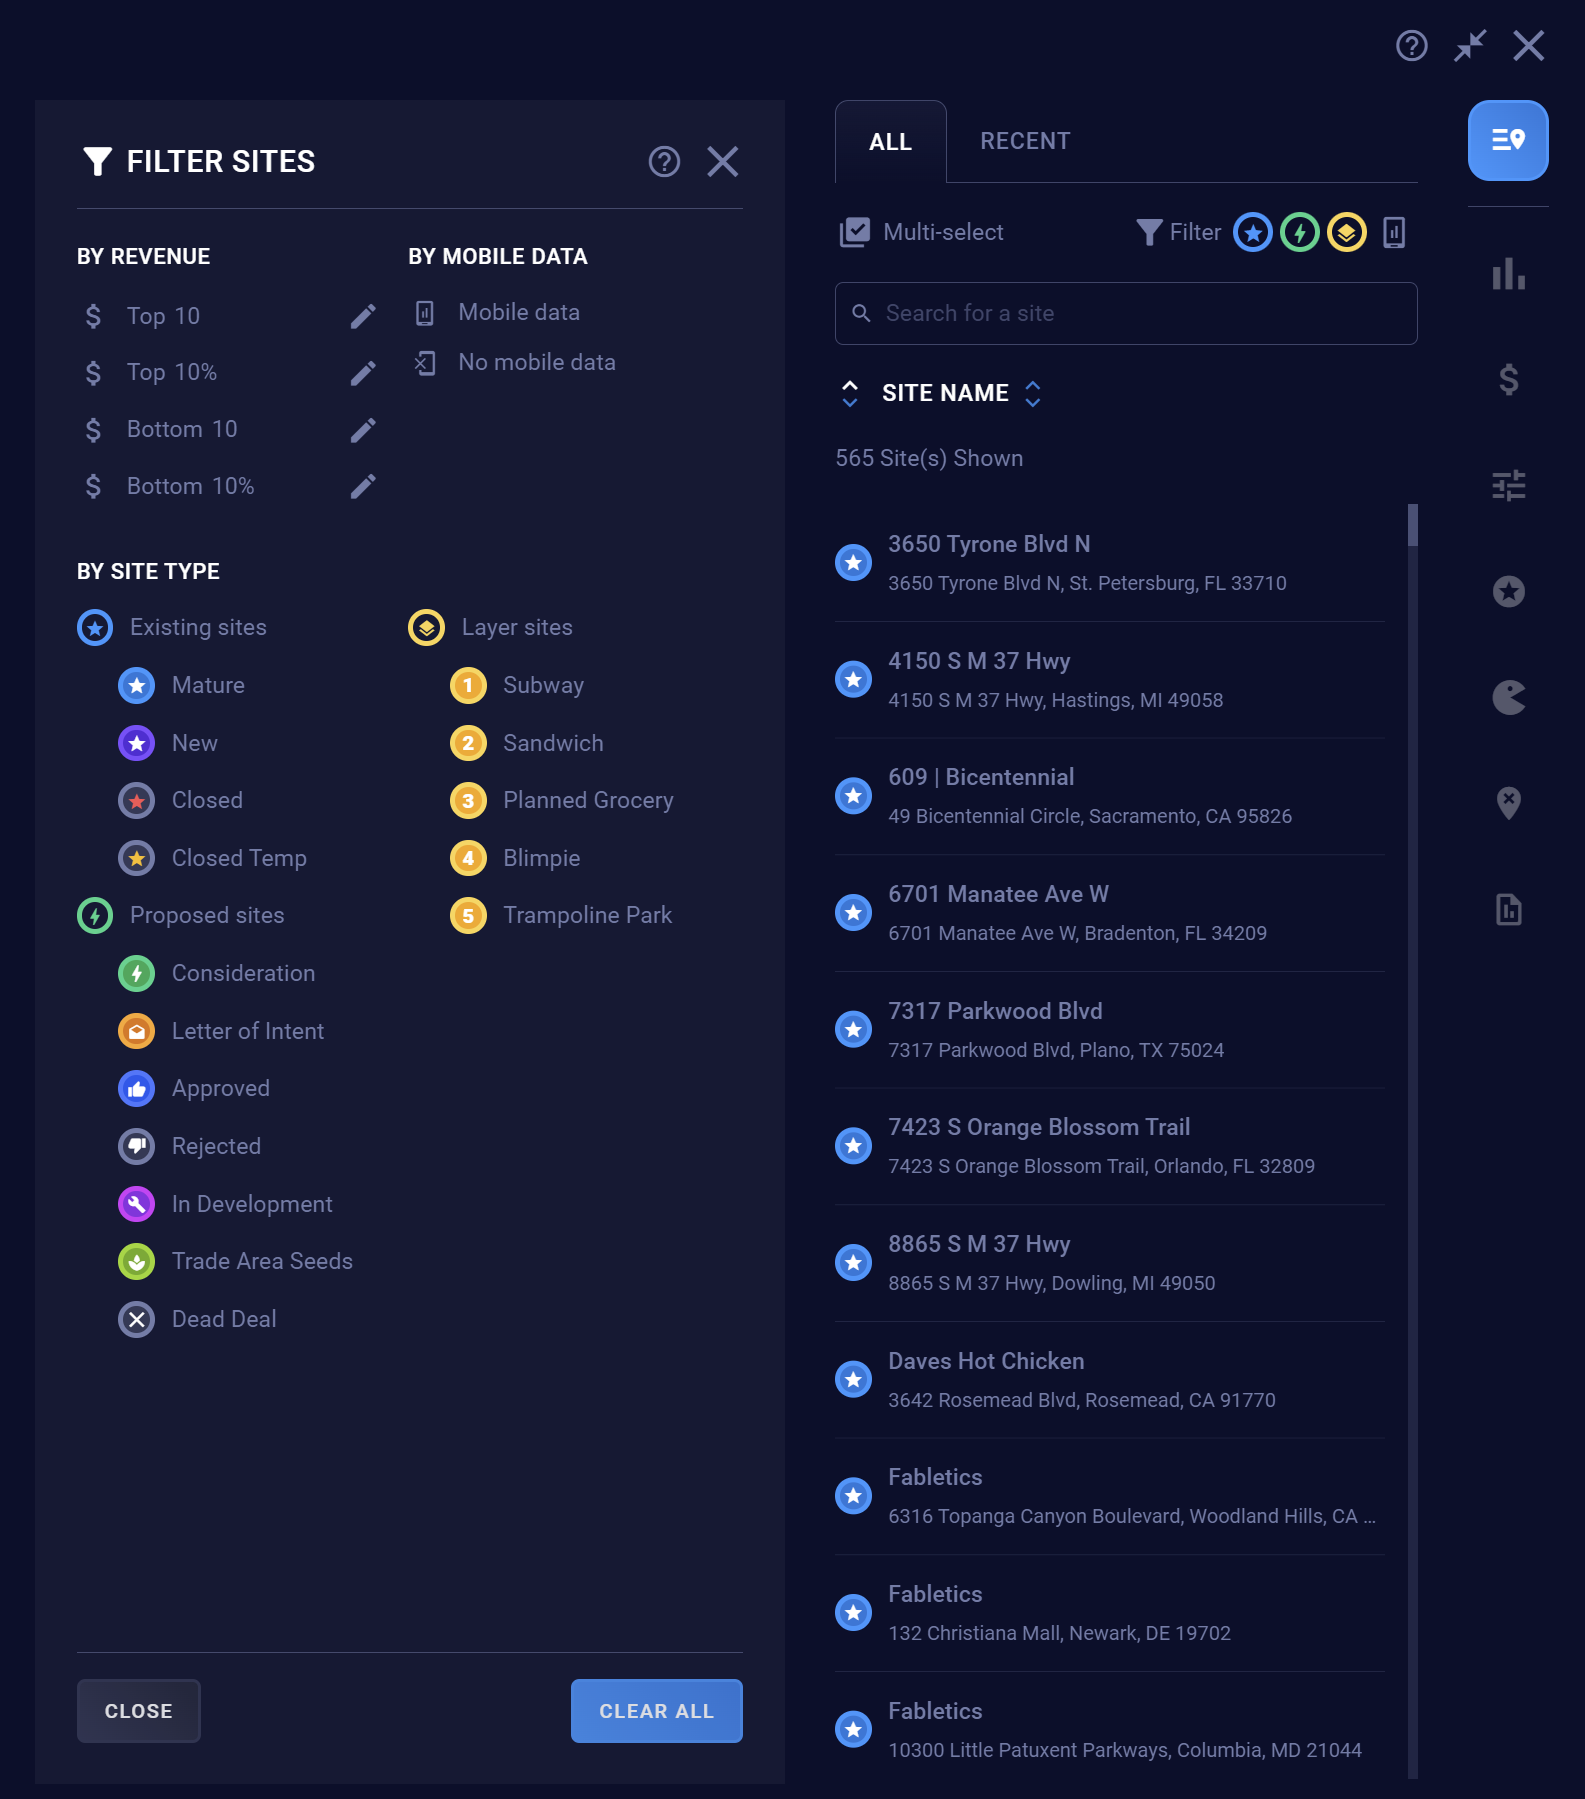
- Additional Filters
Select Filter (funnel icon) to see additional ways to filter. Additional filters include filtering by Top or Bottom count by revenue or %, more specific pin types, and filtering by no mobile data
Site Navigation
To navigate your map to the location, you can click the site name or address in the Project Sites list.

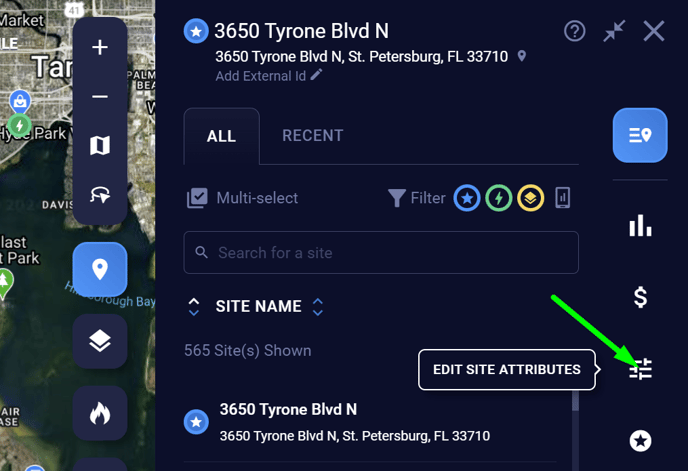
Edit Sites
Edit Sites by clicking the desired site from the Project Sites list. The Site Toolbar will then become available for use (icons go from greyed out to white, signaling their usability).
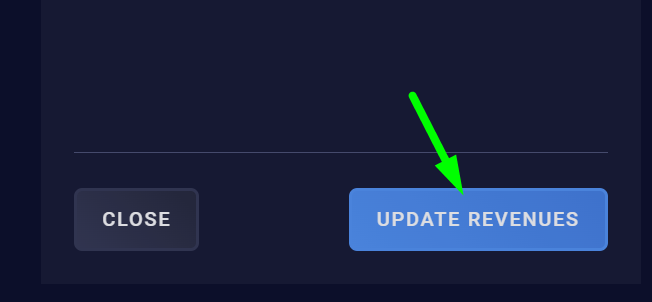
Editing Revenues:
- To edit revenues, select the dollar sign icon from the Site Toolbar.
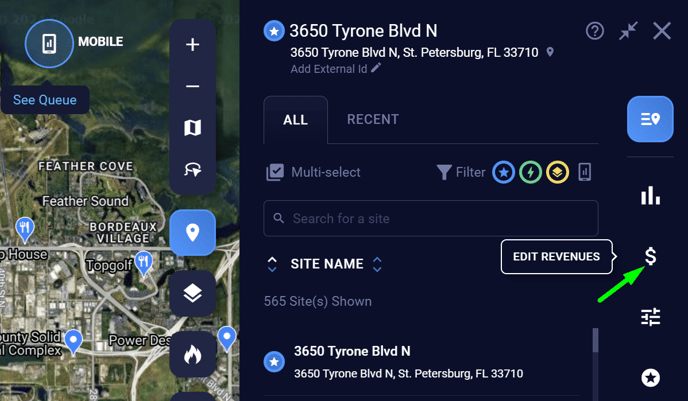
- Input your revenue changes by typing into the available boxes and then hit Update Revenues at the bottom of the panel.
Editing Attributes:
-
To edit attributes, select the slider icon.
- Make your desired changes & then hit Update Attributes at the bottom of the panel.

Changing Pin Types:
- To change pin types on a saved address, select the circular star icon from the Site Toolbar.
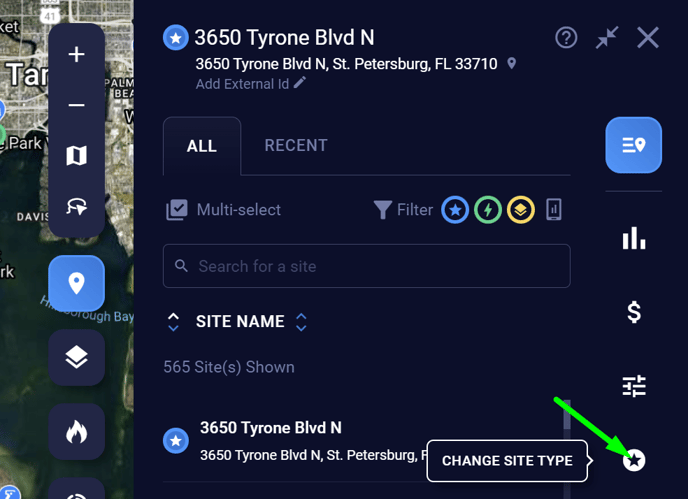
- This will open the Site Type panel where you will make your pin type selection.
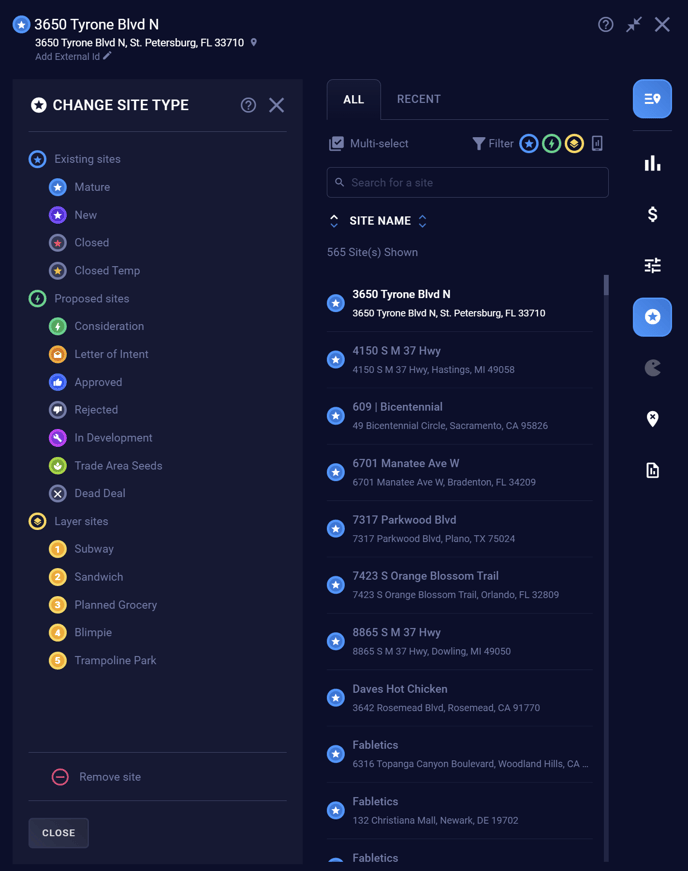
- Once a new pin type has been selected, you will be prompted to confirm the change. Once you confirm, the change will save.

Warning: Changing a mature pin into any other pin type (or removing it altogether) will result in a change to the model data. You will be prompted to rebuild to implement this change. Unless you are actively building models on your own, please reach out to your Support rep before hitting Rebuild.